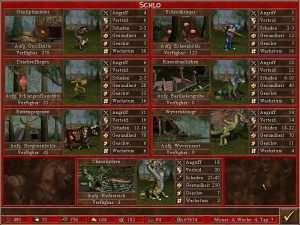
Playing the numbers correctly has always been the key to victory in the Heroes of Might and Magic series. Units have standard attack and defense values, determining how much punishment each member of the unit can give and take. Yet developing your hero is just as essential to victory. Finally, it is important to optimize the production of units—quality is important but sufficient quantity is really the key.
|
CONTENTS 1. Recruitment Basics |
Recruitment Basics
 Campaign scenarios generally favor a particular town type. Usually, this town type is suited to the primary hero—you won’t generally be given a necromancer and be expected to raise a Rampart castle, or a druid with an Inferno castle. Seek out other similar castles early, and load up your primary hero well with creatures from these locations. It is dangerous to mix creatures from more than two town-types; morale plummets and may cause units to freeze in battle. When enemy castles have been annexed, recruit units there for guard duty only.
Consider hero strengths when making that all-important important decision of what to recruit and when. Early in the game, money is usually an issue. Heroes need to surround themselves with as large an army as possible until enemy ranks have been thinned. Generally then, the early game will see castle stockpiles of creatures depleted every week. If the hero receiving the troops is strong in archery skill, ranged creatures will be a priority. If he or she has high attack and defense bonuses, go with horde creatures and fast creatures (you need the speed to engage enemy ranged units, lest they cut your hordes down to size). If the hero is a powerful magician, slow, sturdy units will help drag combat out over a number of rounds, leveraging that hero’s spell casting prowess.
Another important recruiting source is on-map generators. Often, a hero must fight a cadre of guards before being allowed to recruit from these sources. Once flagged, though, generators will offer a fixed number of creatures per week, ranging from free level 1 critters to market price for dragons and dark knights. Generators do not accumulate creatures over time, if you fail to recruit there one week, don’t expect to find double the amount the following week. Therefore, recruiting from generators should be a priority, castle creatures will still be available.
Maps are filled with stacks of creatures which guard everything from horseshoes to castles to the pits of hell. Usually, these creatures are hostile and will attack or flee when approached by a hero. Sometimes, however, they will offer to join, either for free or if the hero is a diplomat, for a price. Either way, this is a boon to the heroes, especially early in the game when armies are small. If rogues are present in the party, right-clicking on the creature stacks will reveal their disposition: in the mood for a fight, willing to join, and so on (the Visions spell is equally effective).
The Knight-Errant
 Having additional heroes at the outset for scouting is important. While it may be feasible to only coddle one or two into combat units, others are useful for accomplishing repetitive tasks. Generators must be visited (remember to reserve cash for this!), windmills and water wheels must be harvested for their weekly tithe, and mines must be re-flagged after the passage of an enemy hero. Eventually, primary heroes are going to be operating far from the home castle, and troops will need to be shuttled weekly.
It is not uncommon to require two or more heroes per town just for taxi service and general odd jobs. Don’t go too far out of the way to develop these errand boys, but do stop at any experience or bonus location along the way—you never know when new leaders may need to be pressed into combat service.
Another important service the Knight-Errant can provide is babysitting—use him as a repository for odd troops collected by the primary hero along the way. If a hero has all slots filled, a group of troops must be discarded to allow a group to join. If pressed into this situation, do the math and make sure discarded units are not worth more than the unit being absorbed. A second tagalong hero can help your primary hero keep an open slot, so no units are wasted. Before the primary hero enters combat against an enemy hero or castle, make sure this squire reinforces the hero to full ranks. Whenever possible, send these odd accumulated units to garrison cities, but keep in mind the morale penalties for more than two types in the same stack.
Developing Your Hero
Most campaigns cover the development of one, sometimes two, heroes. Each scenario in the campaign has an experience cap; you’re not allowed to kick around indefinitely and create a massively powerful individual who lays waste to subsequent scenarios. (Bummer, eh? –ed) Assuming an average pace, heroes should reach this cap before the end of the current scenario, merely through normal combat and experience generators. Experience from treasure chests are not needed by your primary characters—keep the money or use the points to develop secondary heroes. Just because a hero is maxed-out on experience doesn’t mean their development is over for that scenario. Schools of War, Mercenary Camps, School of Magic, and other locations offer a one-time enhancement to primary statistics – attack, defense, power and knowledge. Heroes should always visit these locations, and it is often worth postponing the completion of a scenario to ensure all such locations have been hit.
During most scenarios, there is also a plethora of temporary enhancements, most involving luck and morale. Artifacts can turn a chump into a champ, collectively raising all manner of attributes. Grab them where you can, but remember this note of caution—while artifacts will automatically equip if your hero has open slots available, they will not upgrade as better items are found. If you’re already using the Dwarven Axe (+2 attack), for example, the Gnoll’s Flail (+4 attack) will stay in inventory unless specifically equipped. Remember to pass along unused artifacts to other heroes so they too may benefit.
The Art of Might and Magic
 Not all campaign scenarios require the enemy players be vanquished, but doing so certainly makes it easier. By eliminating enemy leaders whenever they are found, the endgame can be rendered fairly peaceful. This tactic deprives the enemy of experienced, powerful leaders and their collection of artifacts. By constantly depleting your enemies’ armies, there is less chance of encountering massive unit stacks that even a Superhero may be unprepared to combat. Take frontier towns when possible, and remember to buy all creatures every week, if for no other reason but to deny them to the enemy.
Make use of lightly equipped Knights-Errand to scout shrouded territories. There is nothing worse than being sucker-punched by a stronger enemy laying in ambush—even restoring the autosave won’t help the situation as the game saves after your move. As Pyrrhus of Epirus taught us, a fair fight is a stupid fight. A Pyrrhic victory where the player has no army left to celebrate is to be avoided. A well prepared, well-led opponent can often rout numerically strong armies with few or no casualties. You should almost always be the one to initiate combat; the AI, especially at higher difficulty levels, does not enter into many combats at a disadvantage. If the battling hero must be kept alive, do what it takes to win; if he or she is expendable, look to maximize attrition. When deploying in a castle, for instance, spread out and give the tower defenses as many rounds as possible to make their missile attacks. Remember the numbers, and take a long view to ensure the numbers are in your favor by the endgame.
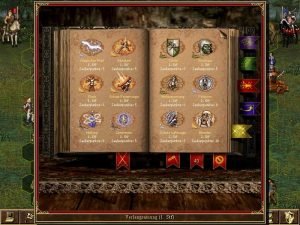 Combat magic is normally a matter of preference. Remember to buy a spell book if your hero begins ‘magically challenged’. When developing a hero whose strength is magic, offensive spells may yield the quickest path to victory. Blind or paralyze are good spells for less adept mages, tying up those pesky archers or horde stacks while other enemy troops can be picked to death by your own ranged units. Spells are diverse enough to allow some creativity if the situation is called for—liches can’t be blinded, but a stack of golems can be teleported adjacent to them, nullifying their ranged attack.
The computer opponent will often employ similar tactics, so if your hero has a large stack of sharpshooters, for example, you may be better off waiting for the enemy hero to cast first, thus giving you the chance to later cure your soon-to-be-blinded archers.
Town Guide
Each of the eight towns of Heroes III has unique creatures and heroes that are associated with them. You have the fairly balanced castle creatures, the strong defenders of the fortress, and the magical resisting rampart. Although it might seem some town types are weak compared to others, if you understand how to play to their specific advantages, you can be successful with any of them.
The Dungeon: The Dungeon creatures are, overall, about average. They are fairly inexpensive, but are also only mediocre fighters. They do have the advantage of having two ranged attackers that do not suffer a melee penalty. They also have a very powerful seventh level creature in the black dragon. The black dragons are especially useful to heroes that are facing magic heroes because they are totally immune to the offensive spells preferred by those heroes. This is a double-edged sword, though, since your heroes cannot cast beneficial spells on them either.
The Dungeon also has some very useful buildings in it. You have the artifact merchants as a source of items and the portal of summoning to give you an additional source of creatures in the town. The resource silo produces 1 sulfur per day to help pay the resource cost of black dragons. The academy of battle scholars gives visiting heroes 1000 experience, guaranteeing that every hero who starts out here is at least level 2. Finally, the mana vortex is a very useful place for any of your magic heroes to visit any time they are nearby. It restores your spell points to double their normal maximum.
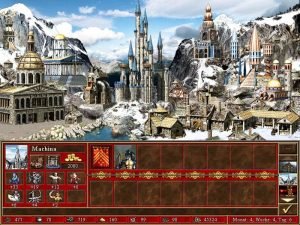
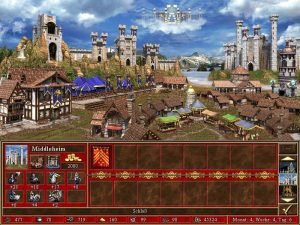 The Castle: The Castle is well balanced with two ranged attackers, good melee fighters, and of course, archangels. First upgrade the archery tower. The marksmen do not have any better attack or defense stats than other archers, but they do get two shots per attack, which effectively doubles their damage per round. Then there is the archangel. The archangel is the most powerful melee creature in the game. It is fast enough to reach any square and has the highest defense and attack stats of any creature. They also have the ability to resurrect once per combat, which makes them even more valuable.
The unique Castle buildings are all about movement. The shipyard allows you to build boats to move on the water. The lighthouse increases that movement at sea. The stables increase your movement on land. If you take castle heroes with logistics and pathfinding, you can cover a lot of territory very quickly.
The Fortress: The Fortress creatures would be slightly below average if not for the fact they were loaded with special abilities. The serpent and dragonflies dispel magic on their targets. Basilisks have a twenty- percent chance of turning their target to stone for three turns. Each gorgon in a stack has a ten percent chance of killing the top creature in the stack they attacked. Wyverns have a chance to poison their target, which does extra damage every round. Hydras attack all enemy creatures adjacent to them with no chance of counterattack. They also counterattack all adjacent creatures, which makes them a good unit to teleport into the middle of a group of enemies, especially if you cast counterstrike on them the round before.
The unique Fortress buildings make it a difficult target to capture if defended. The blood obelisk and glyphs of fear boost the attack and defense skills of a defending hero by two. The cage of warlords permanently boosts the defense of any hero that visits by one. The Fortress can also build shipyards.
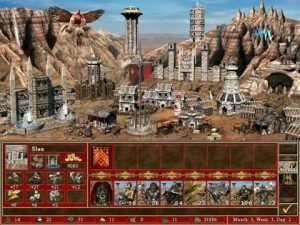
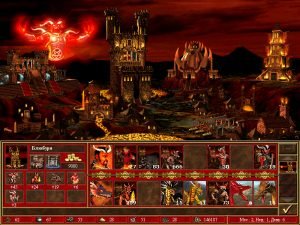 The Inferno: The Inferno creatures are good melee fighters. This means you are going to want to pair them up with a good might hero, preferably a demoniac. The only ranged units are the gogs who upgrade into magogs. This upgrade does boost the attack rating and makes their attack hit the target and all adjacent hexes. They are good castle defenders who can attack the bunches of enemy units waiting outside the walls, but it severely limits them when trying to support their own melee units. This makes gogs the one unit that it is often best not to upgrade. The seventh level arch devils are very powerful, but use caution when fighting archangels who are faster and can do extra damage.
The Inferno buildings lend themselves to a single hero defending all Inferno towns. The brimstone storm clouds boost the defending heroes power skill and the castle gate allows a hero to travel instantly to any unoccupied Inferno town. The order of fire also permanently boosts the power skill of any visiting hero, so it is usually a good idea to send all your heroes for a visit.
The Necropolis: The Necropolis is populated entirely with undead creatures. This makes the Death Ripple spell particularly useful when fighting since your army will take no damage. The skeletal warriors are second only to the Rampart’s centaur captains in strength of first level creatures. Both the black and dread knights outclass any other sixth level creatures, especially with the dread knights; twenty percent chance of delivering a double damaging deathblow.
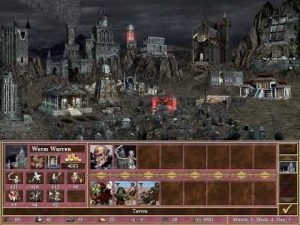 The ghost dragon is the weakest of the seventh level creatures, but with its chance to age the entire stack of enemies it attacks offsets some of that weakness. Of special note are the liches and vampire lords. The liches have an area effect ranged attack similar to the Inferno magogs but with one change: undead in the adjacent squares are not affected. This allows them to hit groups of enemies without damaging your undead troops who are at melee range. The vampire lords have the ability to drain life and resurrect members of their stack, both when they attack and counterattack.
The Necropolis has a variety of unique buildings that help you and hinder your enemies. The necromancy amplifier boosts the necromancy skill of all of your heroes with the ability. If you control several of these and have your heroes reach expert necromancy skill, it becomes very easy to put together a horde of skeletal warriors quickly. You can also use the skeleton transformer to turn any other creatures into skeletons. This is a good use for small groups of wandering creatures that join your hero. You also have the cover of darkness that hides the map all around the town, allowing you to move your heroes unseen and especially slowing down computer opponents who cannot remember the hidden map at all.
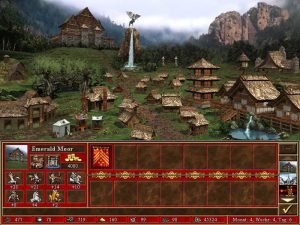 The Rampart: The Rampart creatures lean very heavily towards defense, including magical resistance. The centaur captains are the most powerful, and most expensive, first level creatures in the game. Most of the other creatures tend to be slower than their enemies. The dwarves and unicorns have 20% magical resistance, and the pegasi increase the casting cost of spells for the opposing hero. The gold dragons are very similar to the Dungeon’s black dragons. They have nearly the same immunity to magic (only effected by fifth level spells), but they are faster though with less health.
The unique buildings of the Rampart help boost wealth, which is good given the more expensive nature of the creatures here. The treasury pays you ten percent interest on the gold you have on day one. Saving towards the end of the week is usually a good idea. The mystic pond also provides you with one to four random resources every week.
 The Stronghold: The Stronghold creatures are a mix of some of the weaker and stronger units in the game. Upgrading your wolf riders to raiders early on is a good idea since the ability to hit twice per attack effectively doubles their damage. The sixth level cyclops kings are the second most powerful ranged unit in the game and can also be used to attack town defenses. The ancient behemoth is only around average strength, but their ability to reduce the enemy’s defense rating when they attack gives them the upper hand when on the offensive.
The buildings of the stronghold are not the most useful around. The hall of Valhalla does boost visiting heroes’attack ratings permanently so visiting is a good idea. The escape tunnel allows defending heroes to flee from combat. However, it is usually a good idea to flee before starting to defend so that you can take your army with you. The freelancer guild allows you to trade creatures for resources, but the costs generally make such trades a bad idea.
 The Tower: The snowy Tower has more ranged creatures than any other, including the most powerful of them, the titans. Upgrading your workshop immediately is usually a good idea since the gremlins are very weak and fighting at range dramatically improves their survivability. Gargoyles and golems are not living, which makes them the perfect troops for fighting against the necropolis’s vampire lords, who cannot drain life from them. The nagas are second only to the Necropolis dread nights in strength, but with their counterstrike free attack, they tend to live longer.
The giants are slightly below average seventh level creatures, but once upgraded to titans, they are arguably the most powerful overall, and easily the most powerful ranged. If you match them with a hero who has the archery skill and archery boosting artifacts, they can do the most damage possible of any creature.
The Tower buildings lean towards building the magical skill of visiting heroes. The wall of knowledge increases the knowledge skill of a visiting hero permanently by one. The library increases the number of spells in each level of the mage guild. The lookout tower is a good way to instantly explore the area all around the town and is cheap enough that the limited usefulness doesn’t make it a waste. The town also has access to an artifact merchant.


")

Leave a Comment